
Have you ever seen those stunning, custom needlepoint stockings and thought it was way too advanced or time consuming to try yourself?
Well that was me! I loved the stunning handmade stockings I saw online but thought that it was far too ambitious, only for the most experienced hardcore needlepoint people, and I could never manage something like that, plus it must take months, or even years, right?
WELL turns out I was completely wrong. Not only have I found a way to make my own completely custom needlepoint stocking, but also I did it in less than 30 days, and you can too.
I went from a complete beginner to finishing a beautiful, fully custom stocking in under 30 days—and you can too.
This is my step-by-step beginner’s guide, with all the tools, templates, and links you need to make it happen.
So this is my guide from a complete beginner who really knows nothing about what they are talking about but somehow managed to do this.
I’m also making a Youtube video to demonstrate all of this but while I work on it, subscribe to see what I’m up to while I’m working on it and so you’re notified when the finished video comes out 🙂
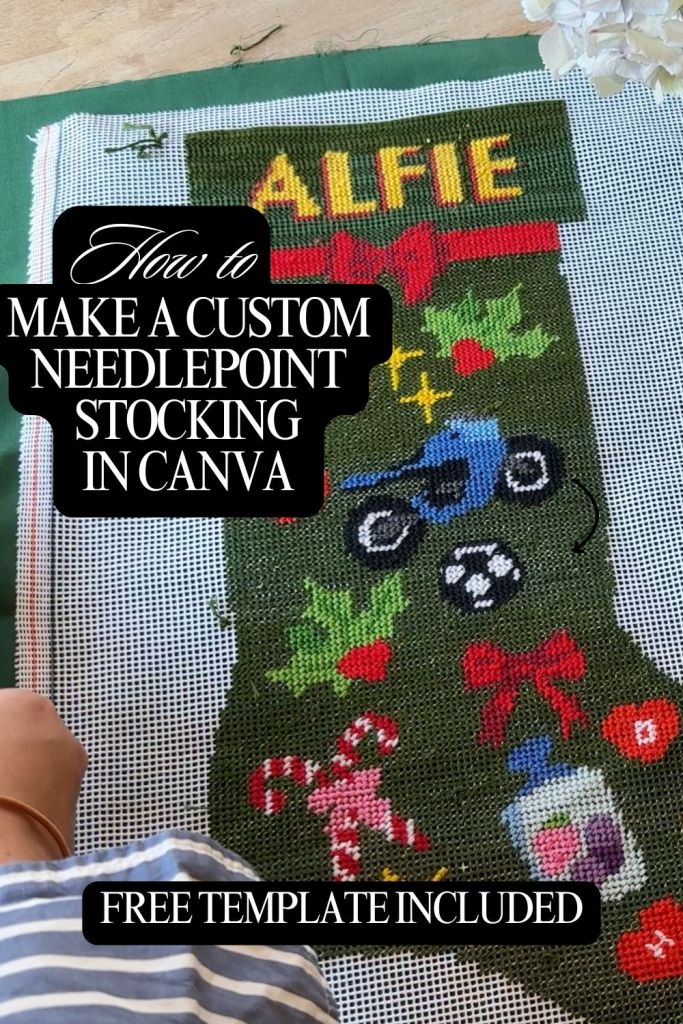
Step 1. Designing Your Stocking in Canva
I started by creating my design in Canva (yes—Canva!). The key is keeping your design simple and bold:
- Stick to flat icons and large shapes.
- Avoid too much fine detail or tiny lines.
- Use clear, easy-to-read fonts for any text.
Don’t do fine detail, or lots of shaded or gradient colours – this will be really difficult to do well as a beginner so keep it simple.
✨ Free Template to Get You Started
To make this easier, I created a free Canva template you can download. It includes three different options for setting up your stocking design:
- Outline template – to guide your shape.
- Canva frame – so you can drag and drop your artwork right in.
- Overlay window – to trim your design neatly.
👉 Click here to grab your free Canva stocking template
This template is the exact template I used, in the correct dimensions for Contrado printing, and I’ve even included my own design with fonts and icons ready to use.
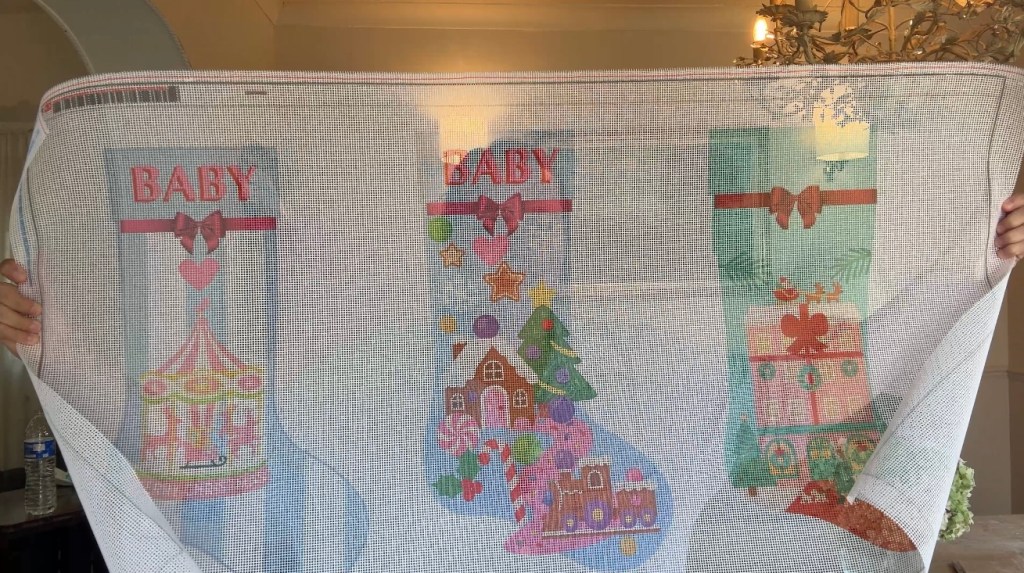
Step 2. Printing Your Design onto Needlepoint Fabric
Once you’ve finished your design, it’s time to print it. This is the magic step that makes the whole project possible.
I used Contrado, a custom fabric printing company that ships worldwide.
When ordering, here are my tips:
- Choose Needlepoint Fabric. There are a couple of options:
- A stiffer webbing fabric (what I used).
- A softer traditional needlepoint canvas.
- I recommend starting with a 10 count fabric (10 holes per inch). It’s the fastest, most forgiving option for beginners.
- Keep in mind: less detail = faster progress + more forgiving results.
💡 Pro tip: Print multiple stockings on one fabric sheet! I printed three at once, then trimmed them apart to stitch individually, and next time I think I’ll add even more smaller designs to fill the gaps (why not!)
👉 Order your needlepoint fabric at Contrado here.

Step 3. Choosing Your Threads (Embroidery Floss)
For stitching, you’ll need good quality embroidery floss. DON’T buy just any brand! Because if you do, it’s hard to find exact matches when you need to get more. I recommend sticking with Anchor or DMC because the colours are consistent and easy to reorder if you run out.
Two good options:
- Starter Pack of 50 Colours – best value for getting started if you want a bit of everything.
- Individual Skeins – perfect if you need very specific colours.
Step 4. Tools You’ll Need
Besides the printed canvas and floss, here are the essentials:
- Needles – This is the exact size I used (perfect for 10 count canvas).
- Embroidery scissors – small, sharp scissors make a huge difference.
- Optional: Custom labels – I added a little label inside mine that says “Made by Mum”—such a sweet finishing touch and makes it feel like an heirloom.
👉 Shop my recommended needle set here.
👉 Shop embroidery scissors here.

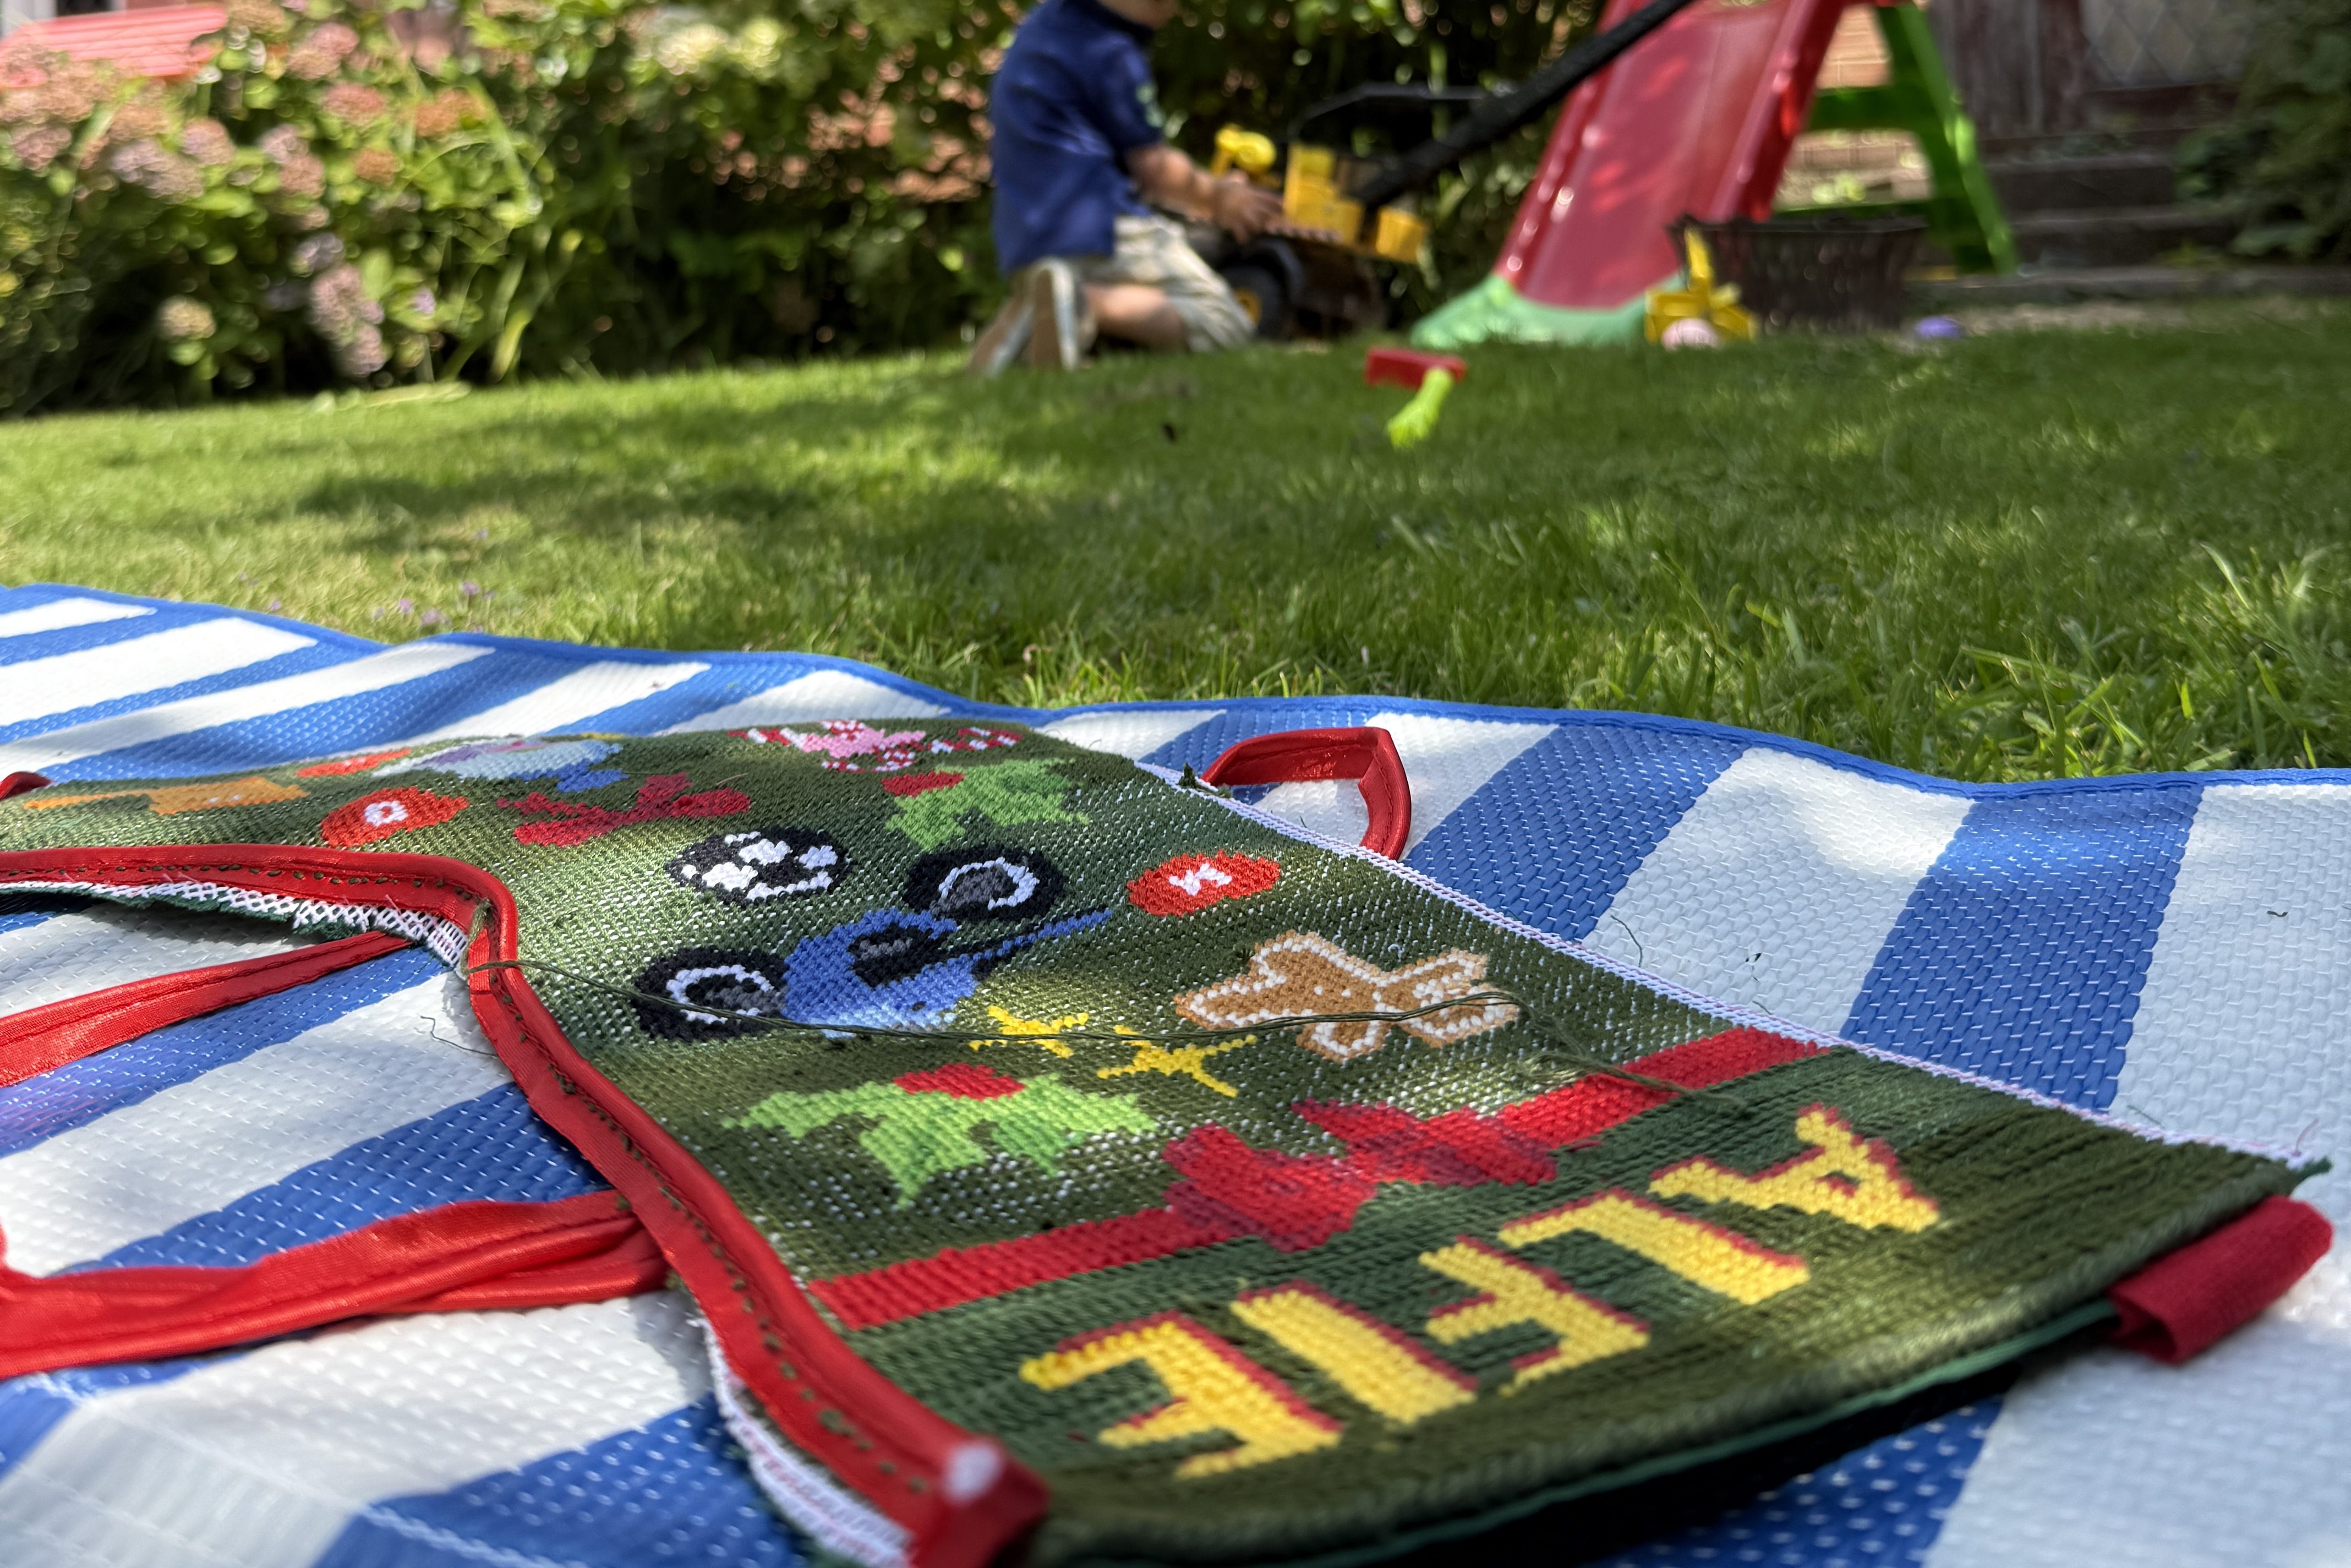
Step 5. How to Stitch
For beginners, you only need two simple things to get started:
- Tent stitch (the classic diagonal stitch)
- Waste knot (an easy way to start your thread)
Rather than reinvent the wheel, I’ll link to two short YouTube tutorials that explain these perfectly. They were exactly what I used to get started.
🎥 Watch Tent Stitch tutorial
🎥 Watch Waste Knot tutorial
Once you know those, you’re good to go!
💡 Note: Because your design is printed on top of the fabric, sometimes you’ll have to decide which colour to place in a hole if it overlaps. Don’t stress—it’s part of the process, and much easier than freehanding.
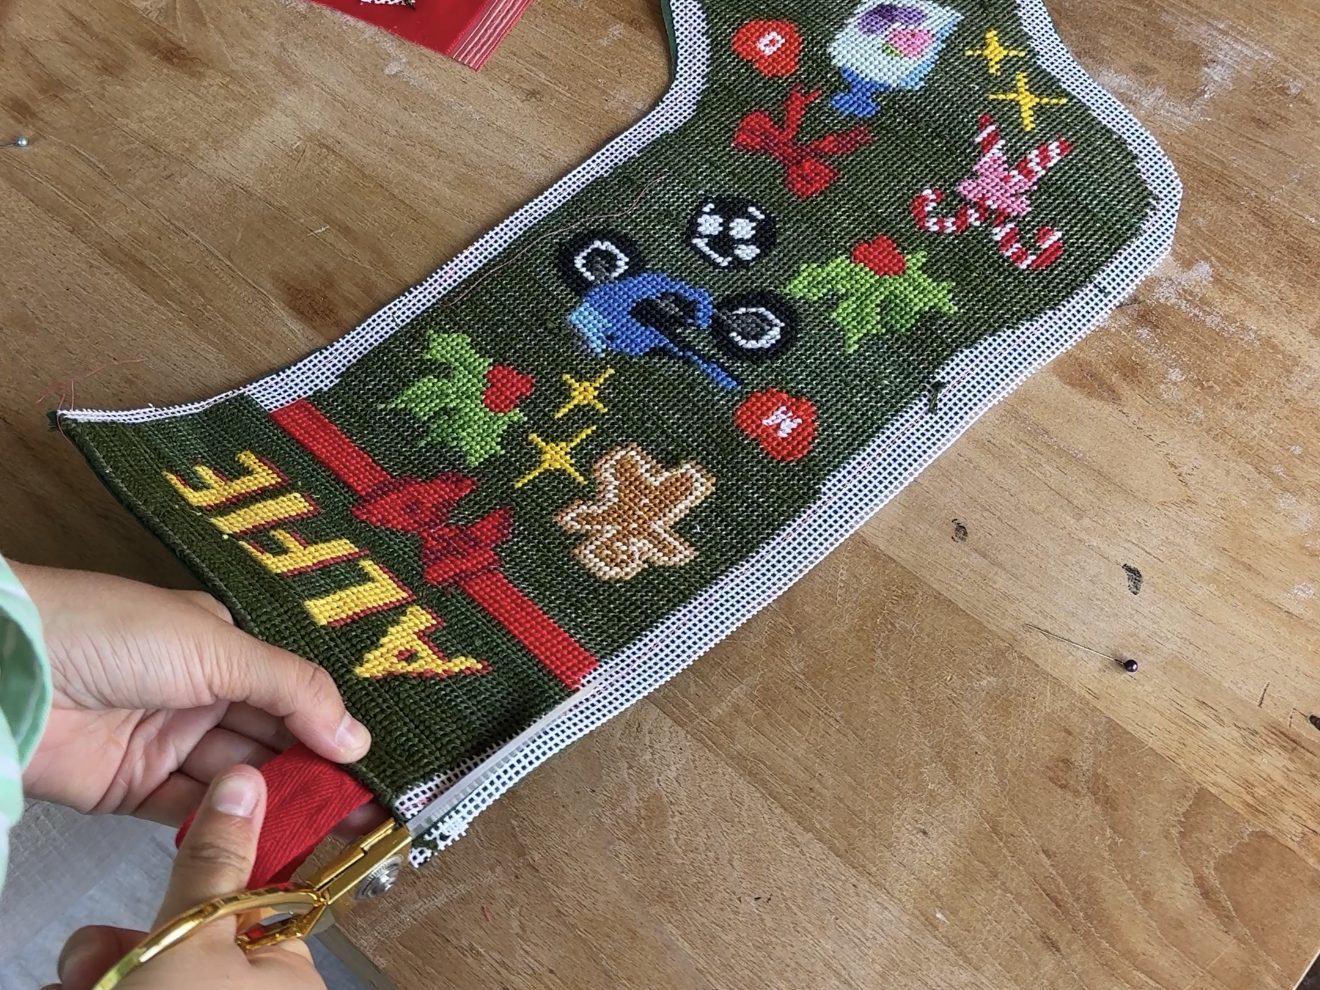
Step 6. My Biggest Beginner Mistake (Learn From Me!)
One thing I wish I’d done differently: I left my background white, thinking I’d decide the colour later.
On a 10 count canvas, the background fabric shows through—so the white under my dark green stitches is noticeable. If I had printed the background in green, it would have looked much cleaner.
💡 Lesson: Commit to a background colour before you print. It doesn’t need to be exact, just close enough to blend with your stitching.

Step 7. Finishing the Stocking
Once your stitching is done, it’s time to assemble the stocking.
I followed this YouTube video tutorial and it was perfect. I recommend hand-stitching the pieces together—yes, it takes time, but it’s just as enjoyable as the needlepoint itself and gives a beautiful finish.
Adding my “Made by Mum” label was the final touch that made it feel special and professional.
Final Thoughts: You Can Do This!
If you’ve ever admired custom needlepoint stockings but assumed they were out of reach, I promise this is possible. With a simple Canva design, Contrado printing, and some embroidery floss, you can create a one-of-a-kind heirloom stocking in under a month.
✨ Remember:
- Download the free Canva template here.
- Order your canvas through Contrado.
- Pick up some Anchor floss and the right tools.
You’ll be hanging up your very own handmade stocking before Christmas morning.
Quick Links (Everything You Need to Get Started)
- 🎨 Free Canva Template
- 🖨️ Order Needlepoint Fabric at Contrado
- 🎁 Shop Anchor Floss
- ✂️ Embroidery Scissors
- 🧵 Needle Set
This post may contain affiliate links. If you make a purchase through these links, I may earn a small commission at no extra cost to you. Thank you for supporting my work!


Leave a reply to How I Made this Needlepoint Excel Ornament (and Why You Should Too) – Phoebe Does everything Cancel reply